
Linux Stopmotion on a Raspberry Pi
Project Type: Raspberry Pi
Software: Linux Stopmotion
OS: Raspian
Kits/Part Source: Raspberry Pi B, Raspberry Pi Camera Board
Project Source: Guru Guide - Raspberry Pi Projects 2015 and http://computers.tutsplus.com by Ben Miller
My daughter says she wants a stop motion camera for her birthday. Okay, not exactly a mainstream request. I found some kits on amazon but I'm not very impressed by them. What if I built her a kit from a Raspberry Pi?
I found out there is a software package called Linux Stopmotion. So I decided to run the software on my Raspberry Pi with a to see if it is something for the kid.
It turns out that running Linux Stopmotion on the Pi with a Pi Camera Board is perfect for what she needs.
- Easy to use Interface
- Animation Playback
- Mutliple Scene Creation
- Frame Editing
- Onion Skinning
- Flexible use for importing images and making time-lapse videos

I referenced a couple of sources for setting up the Pi and Camera Board with Linux Stopmotion.
Guru Guide - Raspberry Pi Projects 2015 and a tutorial at http://computers.tutsplus.com by Ben Miller
I'm pretty happy with the software. Now I plan on getting my kid her own Raspberry Pi and getting her setup.
1-10 Ratings of the Tutorials
IKEA Rating - 5
Both guides were useful but both guides also have their issues with configuring the Pi Camera Board with Stopmotion. It took me a day or so to study the issue and come up with a work around.
Tony Stark Rating - 1
The tutorials do assume you know something about using terminal but that's all.
How I Did it
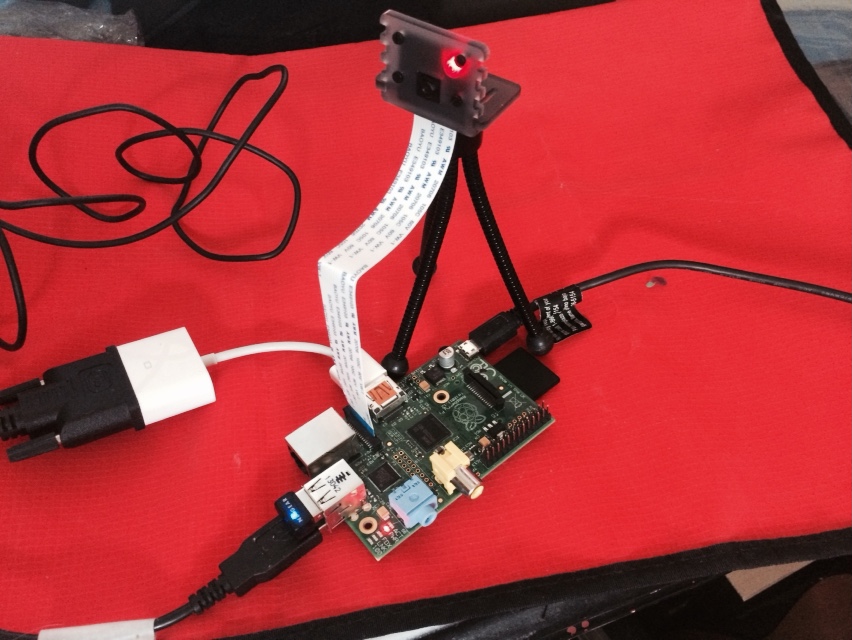
RASPBERRY PI CAMERA BOARD
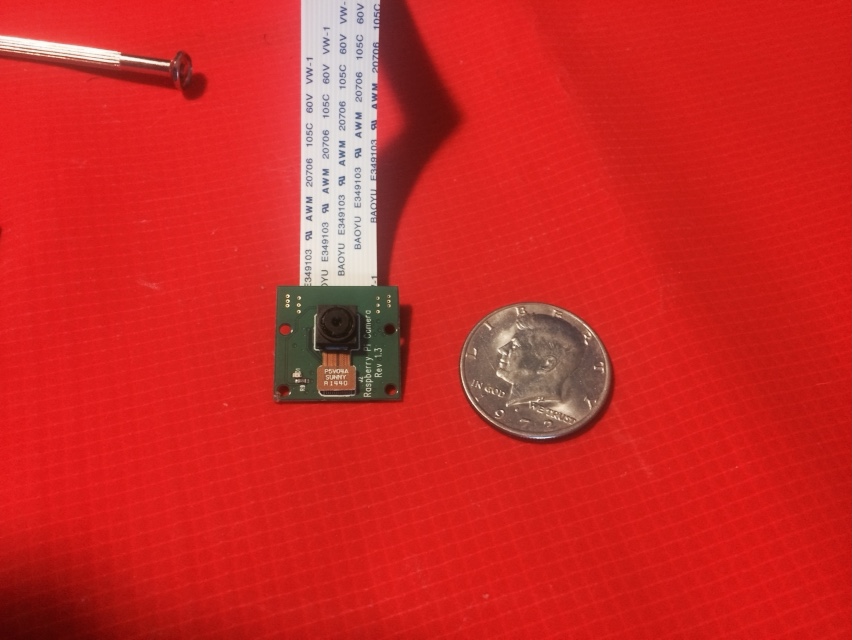
Raspberry Pi Camera Board
Setting up the camera board is straight forward. I recommend following the instructions at https://www.raspberrypi.org/learning/python-picamera-setup/worksheet.md then play with the camera a bit.
User space Video4Linux (UV4L)
From what I understand, the stopmotion software is designed to work with a USB web camera. So, the UV4L driver needs to be installed to make the Pi Camera detectable as though it were a USB camera. To do that, the following code needs to be run in terminal.
wget http://www.linux-projects.org/listing/uv4l_repo/lrkey.asc && sudo apt-key add ./lrkey.asc
sudo sh -c 'echo "deb http://www.linux-projects.org/listing/uv4l_repo/raspbian/ wheezy main" >> /etc/apt/sources.list'
sudo apt-get update
sudo apt-get install uv4l uv4l-raspicam uv4l-raspicam-extras
Run sudo reboot after the UV4L stuff is installed.
Install StopMotion
The next step is to install Linux Stopmotion. It's open source and free! Run the following line in terminal.
sudo apt-get install stopmotion
Problem #1
Now we run into the first hurdle. If you try to run the camera using Stopmotion, you will see that the Pi Camera's default preview widow launches too. You will also discover that the Pi Camera's default preview widow launches at full screen and blocks the view of the Stopmotion interface.
Both the Guru Guide and Ben Miller have instructions on disabling the preview window by modifying the UV4L driver file.
I could not make this work. The UV4L driver file looks different than what is described in their instructions.
I was able to get around this by modifying the configuration file.

uv4l-raspicam.cof
The settings are commented out with hashtags so all I had to do is remove the hashtag for the preview setting, I changed
# nopreview = yes
to
nopreview = yes
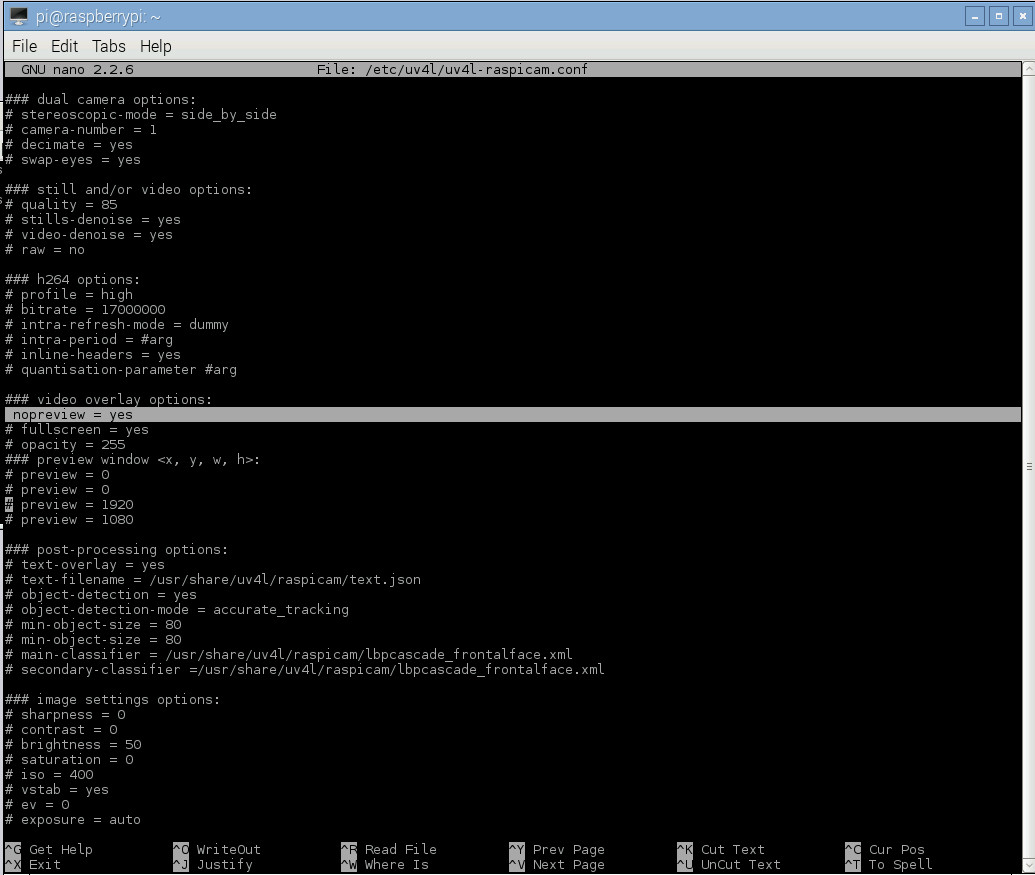
Now the Pi Camera's default preview widow no longer gets in the way of Stopmotion.
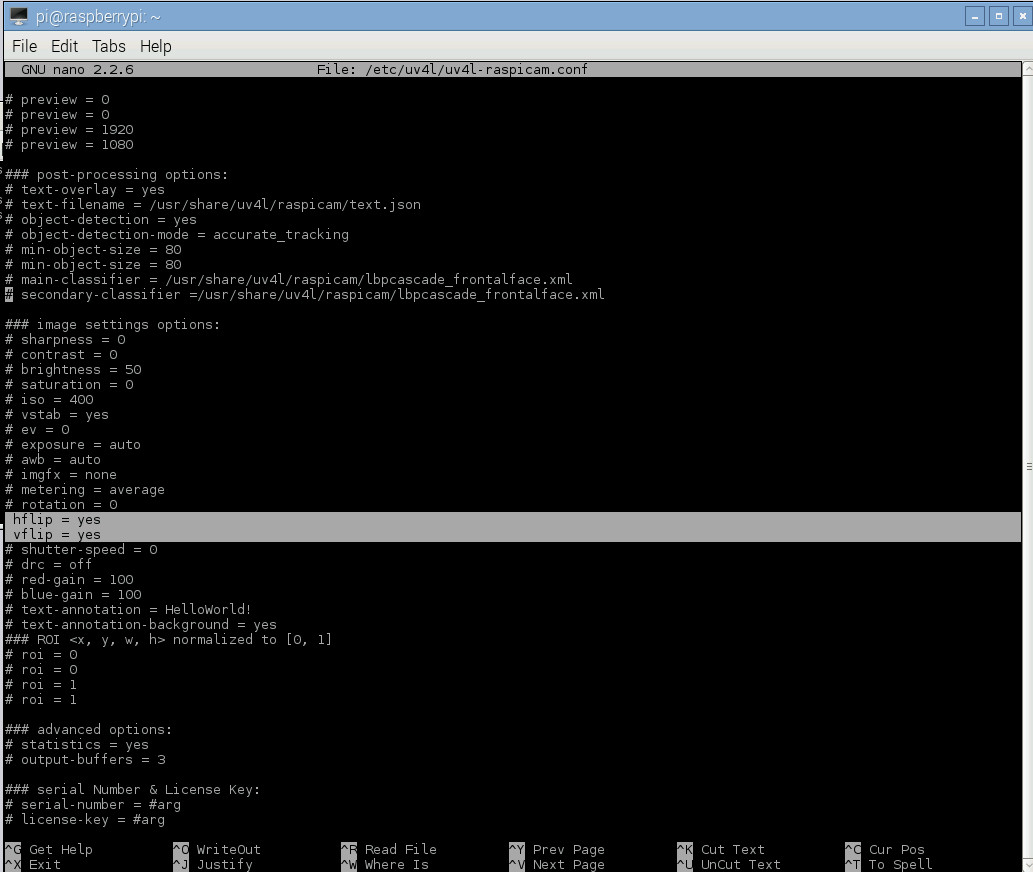
Usful Tip:
If you need to turn the camera upside down, you can change the following.
# hflip = no
# vflip = no
to
hflip = yes
vflip = yes
Problem #2
Okay, so I made a test animation and saved as a .mp4 file. Now what? I'd like to get it over to my Mac Mini. It turns out that my Pi is setup on Wi-Fi so I can do something with that!
I installed Netatalk by running the following line in terminal
sudo apt-get install netatalk
Reboot.
Now I can connect to the Raspberry Pi from the Mac with afp://Raspberry Pi IP address. Either through Finder>Go>Connect to Server or in the Mac terminal by running the following
open afp://Raspberry Pi IP address